Vehicle Stabilization
♦
Reasons for Stabilization– Keeps the vehicle from moving or rocking – Keeps the car from "relaxing" when the roof posts are cut – Secures a vehicle on a hill/slope/embankment – Vehicle hanging over barriers/guardrails/bridge abutments – Vehicles into buildings or other structures
♦
Common Vehicle Positions– The three most likely positions a vehicle will end up in after an accident are:
• On all four wheels
• On its side
• On its roof
♦
Placement of Cribbing– Place cribbing for maximum effect, allowing for patient contact and removal – When using step chocks, cribbing should be placed ahead of the door at the "A" post and ahead of the rear wheel for an upright vehicle – In simple terms place the cribbing where it will prevent the vehicle from moving
♦
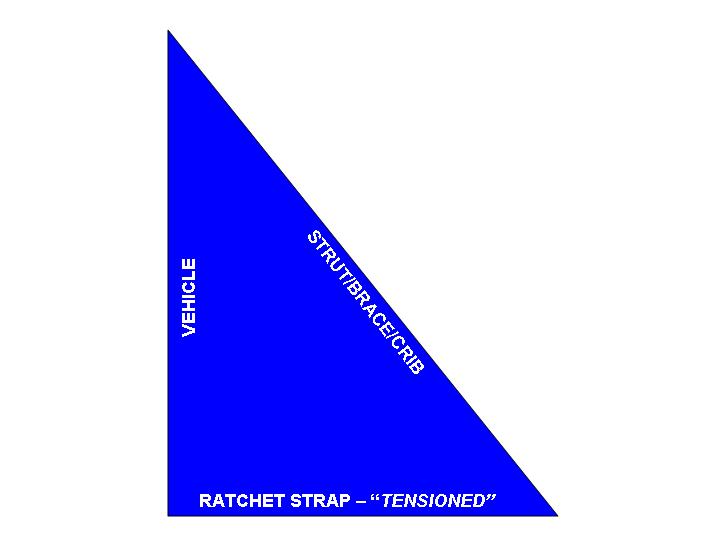
️Struts used for stabilizing a vehicle on its side- JFRD uses 4"x4" wood struts with aluminum base plates and top plates along with a 2"x 12' ratchet strap to form a triangle sometimes referred to as a buttress brace.
- The base plate is painted safety orange and should be used on the base at all times.
-The base plate has a chain slot if a chain is needed for end to end stabilization.
- The top plate is not painted.
- The ratchet strap has a cluster of hooks on a sliding ring attached. 3 hooks are available for multiple attachments.
-The 4"x4"'s are to be cut to a length of 6'. This will provide an approximate angle of 45 degrees and a strut length of approximately 8' with the base and top portion in place.
-The post can be cut to length on scene if needed.
♦
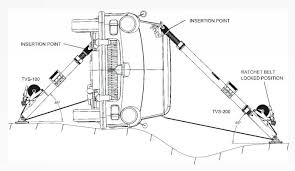
️How to apply the strut-Determine length of strut needed.
-Place base and top on post.
-Place strut on both sides of vehicle on side opposing one another.
-Hook ratchet strap to base with ratcheting mechanism close to base.
-Hook free end to top portion.
-Slide hook cluster to find a low point of attachment on vehicle.
Note: On frame side (underside) multiple holes will be available. Choose the hook needed. On roof side (smooth surface) a purchase point may have to be made with a tool. Choose as low a point as can be made and apply hook needed.
-When hooks is applied, take up slack with ratchet and when strap is taught, pally only enough pressure to hold strut into vehicle.
-Opposing struts will create a triangle brace which will create a safe working environment.
-Use step chocks and wedges and box cribbing where needed.
-If end to end vehicle tie in is needed, use chains, "J" hook, come-a-long, or rope.
-Attach to rear end, run chain to base of strut, place chain in chain slot on base and continue to front end. Anchor, and tighten chain.